
In this blog I’m going to explain how I made a Python script to “funkify” images with Python code. The program is fast enough that it even works with real-time video!
Background
My fiancée is in the math department of the local university. Every year there is an event for grade schoolers to see science being done at the university. It’s a way for the science department to excite young minds by showing them ways that science is fun.
The math department was looking to do something, so my fiancée asked me for ideas. I had read about using Python to “cartoonify” an image and I thought the kids might like something similar. We could setup a monitor with a webcam, then the kids could walk in front and see them being converted to a cartoon in real-time.
Original Method
The method in the article linked above is okay, but it wasn’t exactly what we wanted.
It has two steps. First, it finds edges using an adaptive thresholding algorithm. This worked very well and took very little time. I kept this in my method. Second, the pixels in the image are grouped together in RGB space using k-means clustering, and then each pixel is recolored by the average pixel color in its group. This makes it so the image has fewer colors, which makes it look a little bit like a cartoon. This technique is similar to toon shading in the video game graphics world.
The biggest problem with this method was that step 2 took way too long. I wanted to be able to run the thing in a fraction of second, but k-means clustering can take minutes to run.
Improvements
To speed up the process, I tried the manually selecting the colors, and then calculating the distance of each pixel to that color in RGB to set the image pixels. This way you could simply recolor the pixel based on the color it is closest to. This would allow you to remove k-means clustering (a slow, iterative algorithm) and replace it with simple calculations.
The next problem was how to efficiently measure distance between the pixels in the image and the chosen colors. Calculating distance in the three RGB dimensions is far too slow, so I initially tried to simply add up all of the dimensions and compare the sums to determine how “close” each of the pixels in the image were to each of the manually selected colors. The idea here was that, by summing the RGB values, the higher values would be brighter than the lower values. Thus, pixels that have close brightness will be assigned the same color.
This seemed to work well enough. But, calculating the distance bet still took too long to run in real-time.
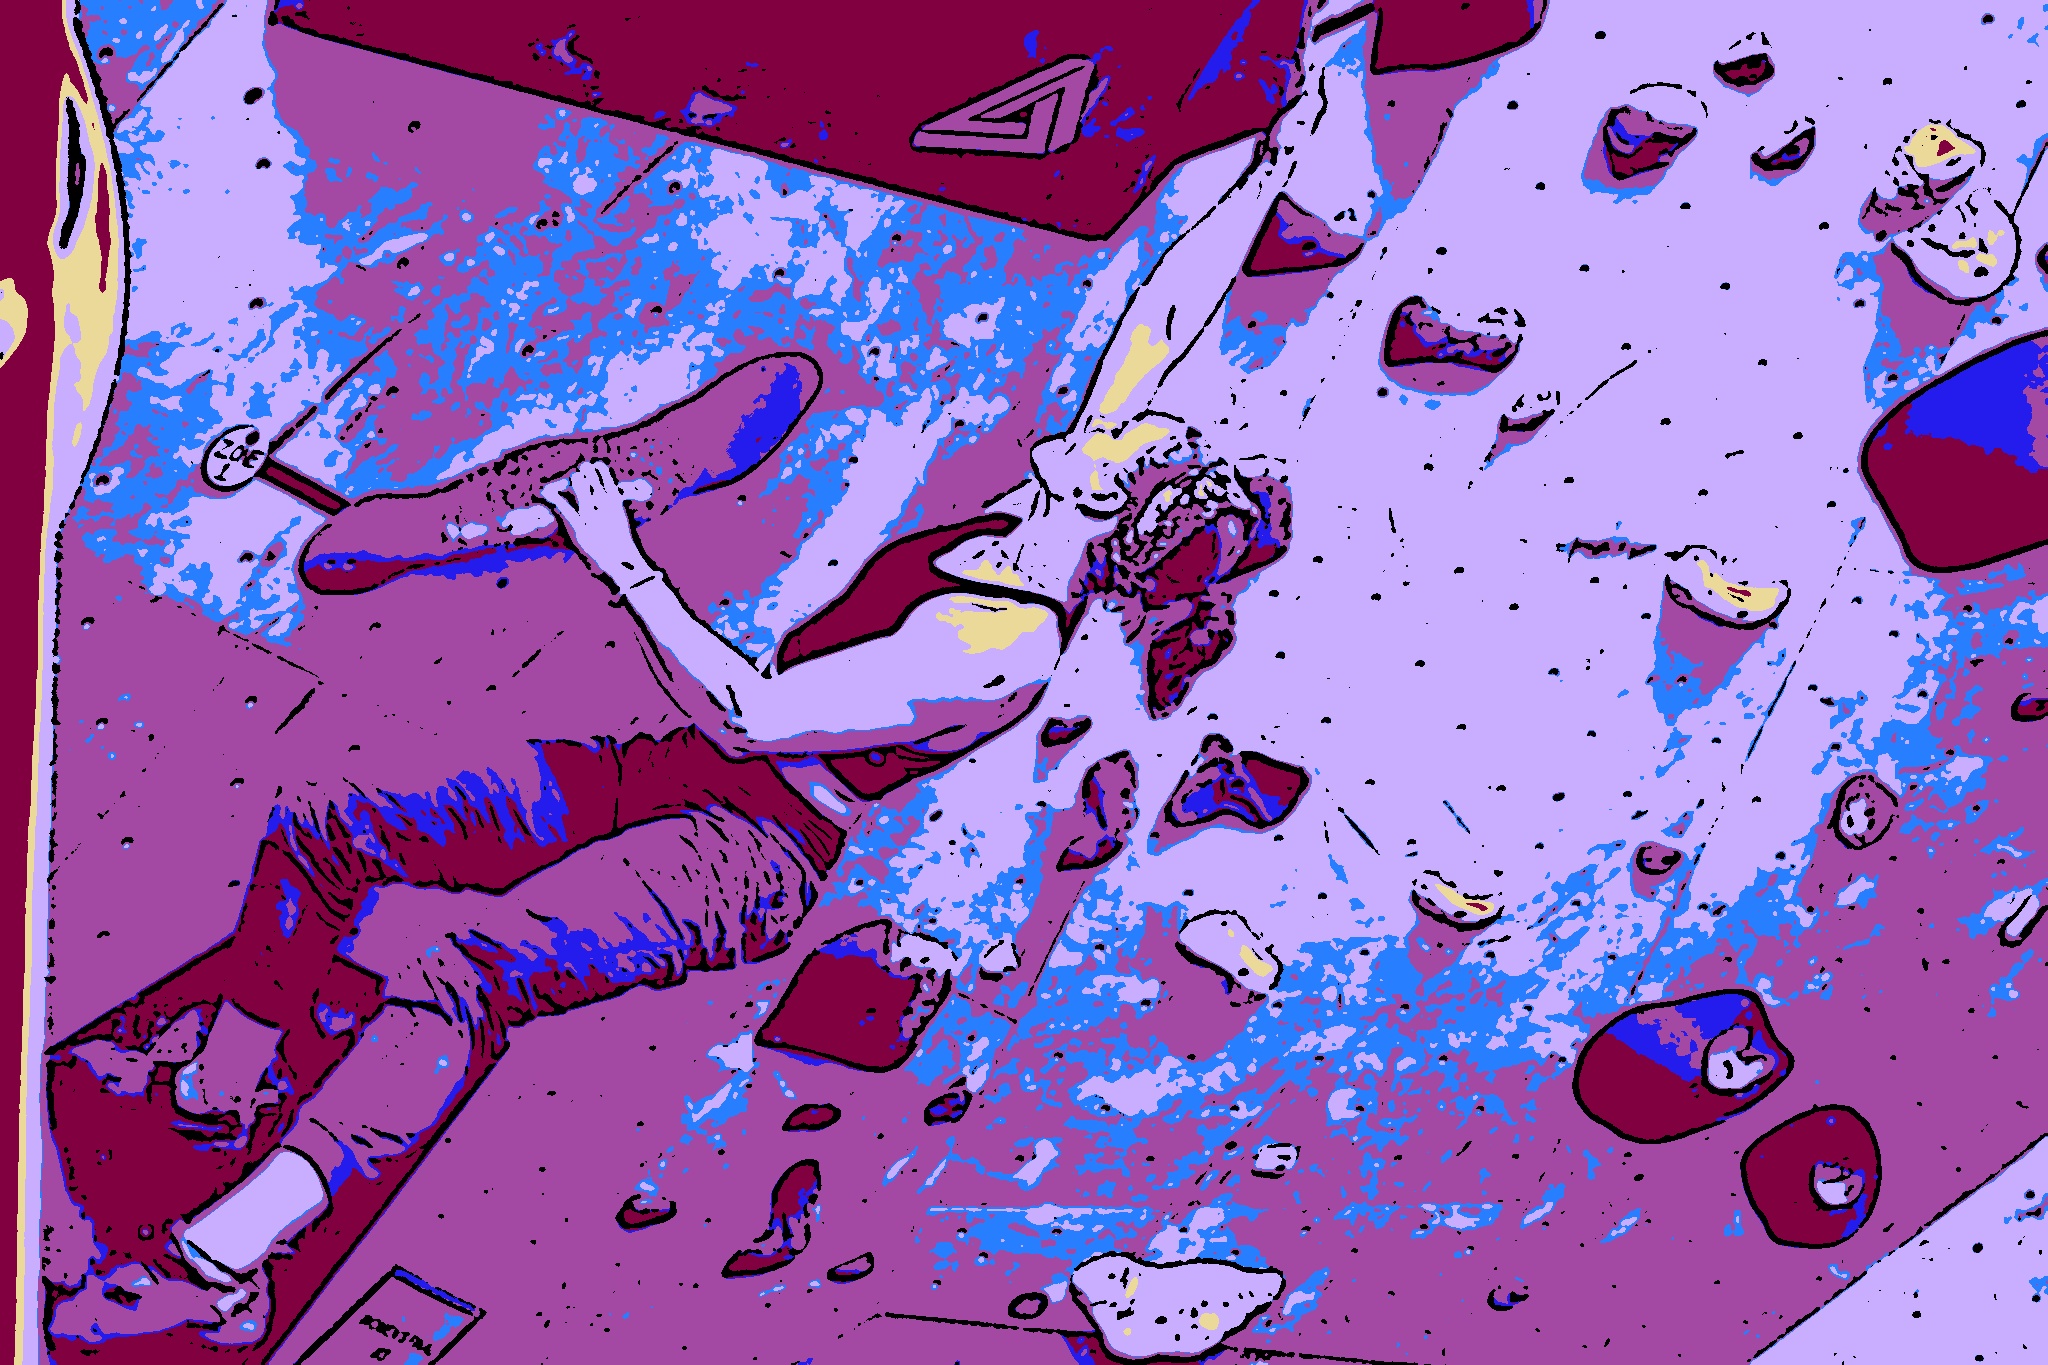
Looking for a way to improve this step, we came up with the idea to simply run an if statement for each pixel to determine which colormap value it was closest to. Using this method, I got amazing results!! Better than I ever expected. First of all, it looked super cool. Check out this Warhol-esque chair and woman:

Second, the method was so fast that it could run with real-time video. This means that for the showcase for the kids, I could use a webcam and have them walk in front of it while it converted the video into cartoon-like video.
Better Version
I revisited the project several months after the event and came up with some cool changes and improvements that resulted in this Python package.
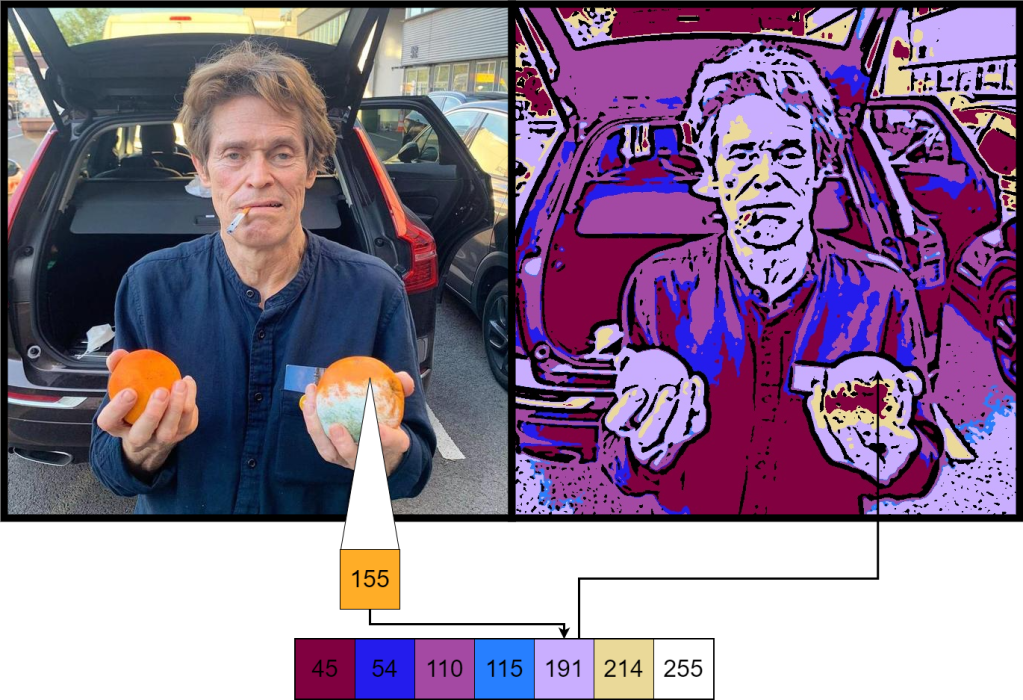
The program works in the following manner. The user selects a small number of colors, either manually, randomly, or by using a Matplotlib colormap.

Then, the program calculates the approximate luminance of each color in the colormap.

Luminance is a quantitative measure of brightness. Each color in RGB contributes to the luminance a different amount. In reality, this is a non-linear quantity, but to save processing time we use this simple approximation:
luminance = colors * [0.114, 0.587, 0.299]which gives better results than simply summing the colors.
To convert the colors of an image, the luminance of each pixel is calculated, and then compared to the colormap luminances using a list of conditions. Then, that pixel gets set to the color of the of the one with the closest luminance.
Because I used the Matplotlib color palettes, you can easily create a whole bunch of different versions of an image, like these


Or you can even convert a video, like this

Hope you enjoyed. Check it out yourself! All you need to do to convert an image is:
import cv2
from funkycam.funkycam import Funk

img = cv2.imread('example.jpg')

funk = Funk()
funky_img = funk.funkify(img)
Leave a comment